
Installing a single pole light switch with proper wiring for light switch is a common DIY electrical project that can help you control the lighting in a room or area. Whether you’re replacing an old switch or installing a new one, this guide will walk you through the steps to install a single pole light switch safely and effectively.
Materials and Tools:
Single pole light switch
Screwdriver (flathead or Phillips, depending on the switch)
Wire stripper
Wire nuts
Electrical tape
Voltage tester
Electrical box (if not already in place)
Wall plate (if not included with the switch)
Step 1: Safety First
Before you begin, ensure that you turn off the power to the circuit you’ll be working on, specifically the circuit with the wiring for the light switch. Locate the circuit breaker or fuse that controls the lighting circuit and switch it off. Use a voltage tester to double-check that there is no electricity flowing to the wires you’ll be working with.
Step 2: Remove the Old Switch (if applicable)
If you are replacing an existing switch, carefully remove the cover plate and unscrew the switch from the electrical box. Disconnect the wires from the old switch, making a note of which wires were connected to which terminals.
Step 3: Prepare the Wires
If you’re installing a new switch or the wires are not stripped, use a wire stripper to remove about 3/4 inch (19 mm) of insulation from the end of each wire in the wiring for the light switch. You should have two wires: a hot (usually black) wire and a neutral or ground wire (usually white or green).
Step 4: Connect the Wires
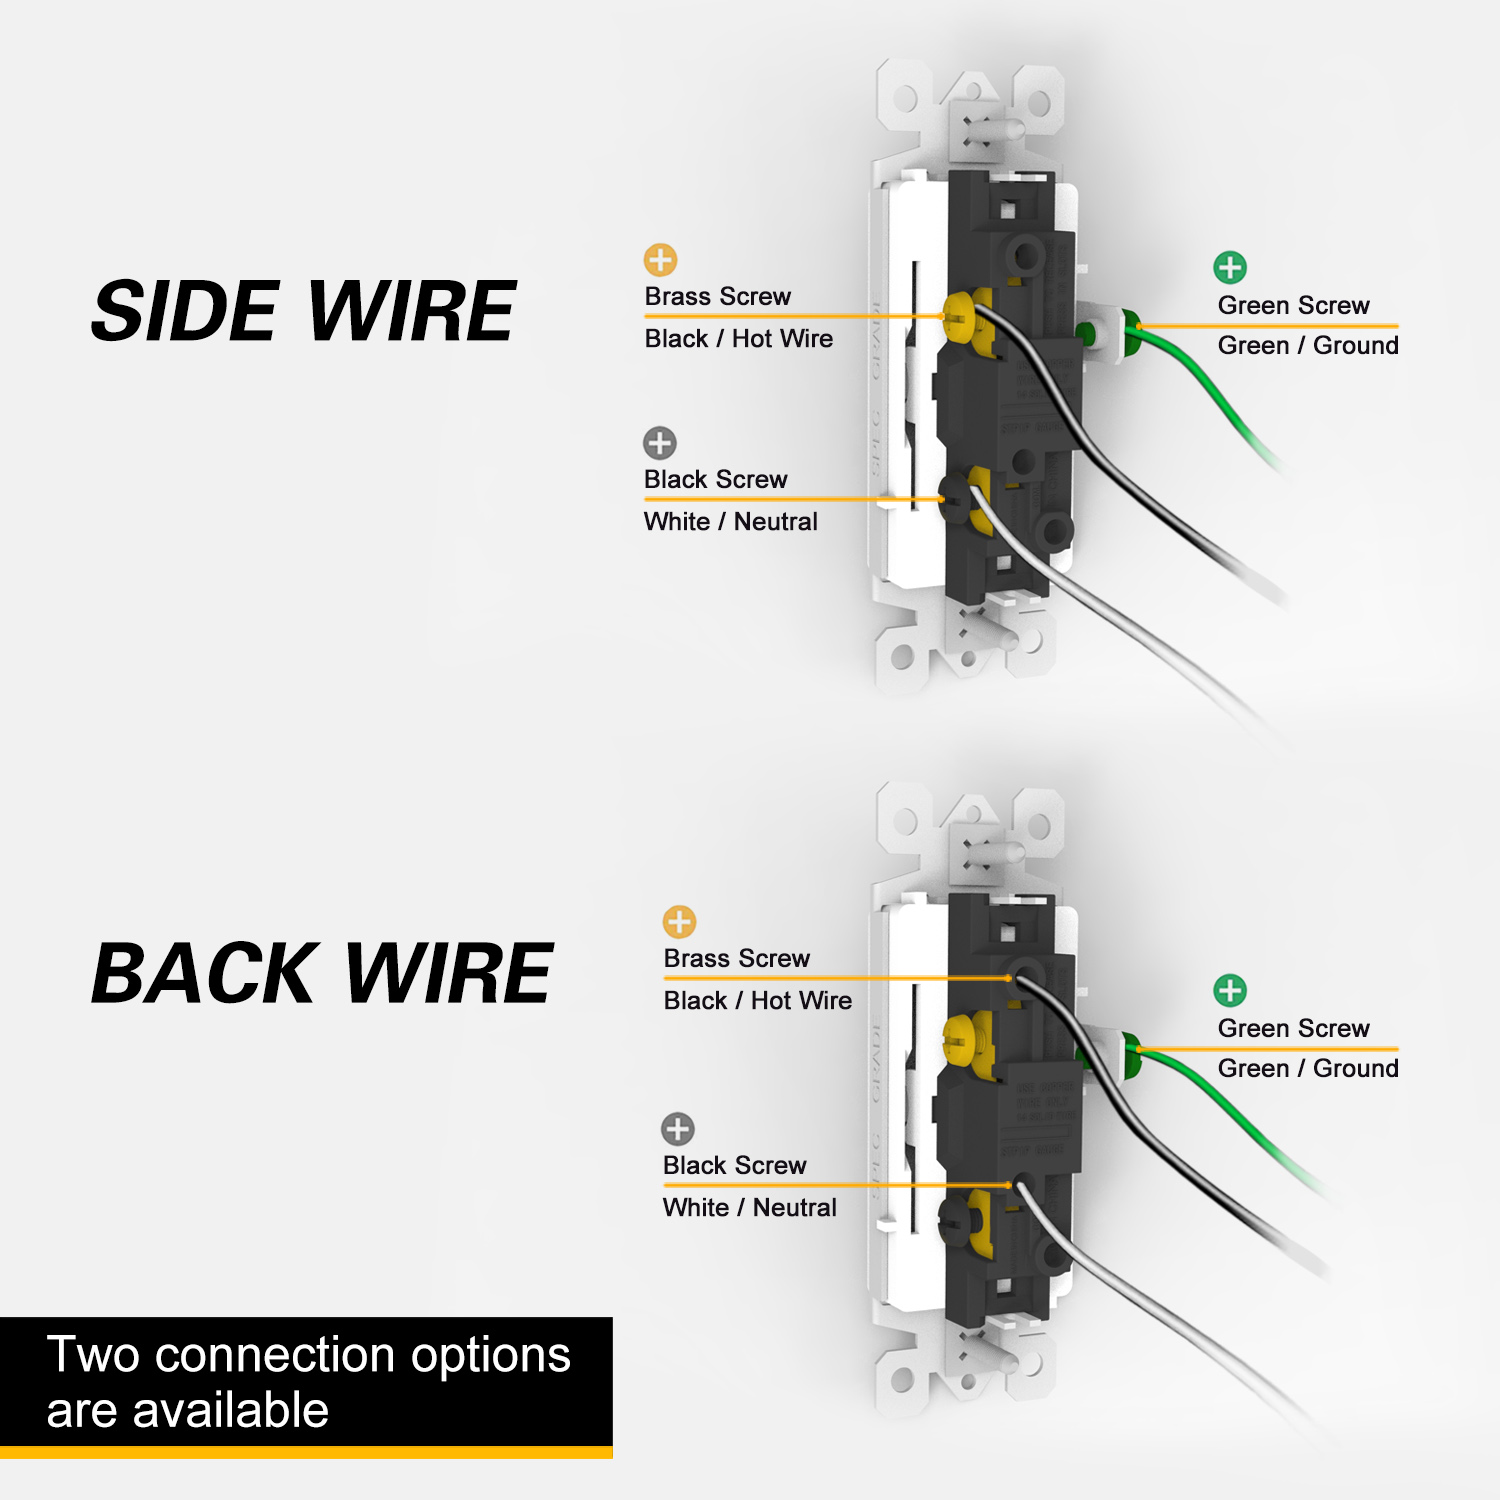
Connect the wires to the new single pole light switch as follows:
Attach the hot wire (usually black) to the screw terminal marked “Common” or “Line” on the switch.
Attach the neutral or ground wire (usually white or green) to the green grounding screw on the switch. If your switch has a separate grounding wire, connect it to the ground wire in the electrical box or to the grounding screw on the switch, depending on the design.

Step 5: Secure the Switch
Carefully tuck the connected wires back into the electrical box, and secure the switch to the box using the provided screws. Ensure that the switch is level and properly aligned.
Step 6: Cover and Test
Place a wall plate over the switch and secure it with the provided screws. Finally, turn the power back on at the circuit breaker or fuse box. Test the switch by flipping it on and off to verify that the light operates as expected.
Congratulations! You have successfully installed a single pole light switch with proper wiring for the light switch. If at any point you feel unsure or uncomfortable with the wiring, consult a licensed electrician for assistance. Safety should always be a top priority when working with electrical systems.
At FAITH ELECTRIC, we understand the importance of power, especially in homes and offices where light is needed in every corner. That’s why we focus on providing high-quality, reliable, and easy-to-install switches and sockets. Just like the single pole light switch you’ve successfully installed yourself, each FAITH ELECTRIC product is designed with your safety and convenience in mind. Illuminate your world with FAITH ELECTRIC – where quality and trust come together.
Post time: Dec-20-2023